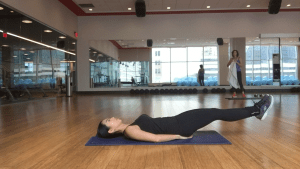
How do you sleep? On your back? Belly? Or do you find you sleep well on your side? Everyone has their favorite sleeping position(s). It may change from time to time, however, if you’re an expecting mother or have specific health problems, the way you sleep may be limited.
In these cases, sleeping in the right posture can make the difference in how you feel when you wake up. Alternatively, sleeping in the wrong position can aggravate underlying problems like back or neck pain. Or even obstruct the airways to your lungs, leading to challenges like obstructive sleep apnea.
Most people are in bed 7-8 hours a night. It’s important to minimize postural stress on your body so that you can achieve quality sleep and wake up feeling good for the new day!
Here are some of the best sleeping postures you should try out to minimize stress on your body regardless if you suffer from a condition or not.
Side Sleeping
By far, this is the most common sleep position adopted by most people. A fetal or side sleeping position is great, especially on your left side if you’re expectant. It helps improve air flow in your body. Besides, it prevents you from pressing your uterus against the liver.
This position is also ideal for snorers. However, if you are curled up too tightly in this position it may restrict breathing in your diaphragm and may result in feeling a bit sore in the morning. Especially if you have spinal issues or arthritis.
To prevent these woes, be mindful of your body position when you lay down to sleep at night.
While laying on your side, only slightly bend your knees and try placing a pillow between them to help reduce stress on your pelvis and low back. Avoid tucking your chin onto your chest.
If you like sleeping on your front or find yourself starting your night on your side and waking up on your stomach, try placing a large or body pillow in front of your body. This will help keep you on your side and restrict you from rolling forwards onto your tummy.
Keep these things in mind when side sleeping:
- Use a pillow to support the neck and head. Check out this video on how to choose the right pillow when side sleeping.
- Place your knees slightly bent, up to 90 degrees, and place a pillow between your knees. You can fill in the extra space with a pillow to get additional support.
Back Sleeping
Sleeping on your back is traditionally considered one of the best sleeping positions for a healthy back. It evenly distributes your body weight and minimizes pressure on pain points. All while at the same time ensuring proper alignment of the neck, head, and spine.
Stick to using one pillow when sleeping on your back. To get additional support, you can place a small pillow under your knees. It helps maintain the natural curve of the spine.
If you are adopting this type of sleeping position, you should:
- Lie flat on your back while facing the ceiling. Caution you should not twist your head sideways. This may result in the joints in your neck being irritated and pain the next day.
- Use one small or thin pillow to support both the head and neck. Avoid using more than one pillow as this will tilt your head forward and can irritate your neck muscles and spinal discs.
- Position a small or thin pillow underneath your knees.
- For a more enjoyable night, you can fill the remaining space between the mattress and your body with additional pillows.

The BIG ‘No-no’ – Sleeping on Your Stomach!
Sleeping on your stomach is an ideal position for those who snore; but it comes with its risks. Although most adults like sleeping in this position, it can often lead to both neck and back pain.
Keeping your spine in a neutral position while relaxing in this position is hard; hence, explaining why it is not a recommended sleeping position. Sleeping on your stomach results in your head being rotated for hours which puts pressure on your joints and strains muscles, which can result in numbness and tingling, irritated nerves, and pain. The sleeping position is quite irritating, and your doctor would most likely agree that it’s a BIG “No-No”!
Pillow Talk: Is your pillow causing your pain?
Back Sleepers:
Your cervical “C” curve in your neck is small. When sleeping on your back, you can roll up a hand towel, t-shirt, use a small cervical support roll, or a thin pillow and fold up the edge into your cervical curve for support.
Side Sleepers:
If you are a side sleeper, pillow use is recommended. A common frustration amongst many is buying too many pillows that were never comfortable and ending up with a pile of eight uncomfortable but now decorative pillows on the guest bed and a sore neck for themselves every morning. The tricky part is there is no perfect pillow for everyone. Everybody has a different shoulder to neck measurement. We encourage to use the “pillow test” to find the right pillow for you.
Pillow Test
Stand with one shoulder against the wall. Place the pillow between the wall and your neck. Completely relax your neck and shoulders allowing your head to fall gently into the pillow against the wall.
Do not push your head into the pillow, simply let gravity take its course and rest against it. Your head should not be tilted. There should only be a lateral shift in your neck of two to three inches. If there is a larger shift, than the spine is being stressed and this isn’t the pillow for you. If you find that there is no lateral movement of your head, the pillow is too thick and can cause awkward postural stress on the spine as well.
Tonight, I wish you the best sleep posture and all it brings; quality, uninterrupted sleep and a refreshed great start to tomorrow!
For further reading, click here to view, “Ten Tricks To Get The Best Sleep EVER!”